
Heartfelt Mothers Day DIY Gifts Your Mum Will Actually Love
When it comes to Mother's Day DIY gifts, it’s the personal touch that truly makes it magic. A handmade gift shows you’ve put in real thought and effort, creating a story that a store-bought item just can’t tell. It becomes a cherished present and a lasting memory all in one.
Why A Handmade Gift Means More Than Anything Store-Bought
Let's be real, mums have a sixth sense for gifts that come straight from the heart. While a shop-bought present is always lovely, something you’ve made yourself just hits different. It’s a tangible piece of your time and affection—a story told through colour, texture, or scent.
Think of it this way: a necklace from a jeweller is beautiful, but a handmade bracelet with charms that represent your inside jokes? That’s a conversation starter, filled with history and love. This is why DIY is so much more than a budget-friendly option; it’s the ultimate personal gesture.
The Power of Personalisation
Making something with your own two hands means you can tailor every single detail specifically to your mum. You could weave her favourite colours into a hand-painted mug or mix essential oils to create a candle with a scent that reminds her of a beloved family holiday. It’s this deep level of customisation that shows you truly see and appreciate her for the wonderful, unique person she is.
- It tells a story: The gift becomes a symbol of your unique relationship.
- It shows genuine effort: You’ve invested your most valuable resource—your time.
- It creates a lasting memory: The object itself holds the memory of you making it just for her.
The emotional impact is huge. It's really no surprise that so many mums secretly hope for something handmade. In fact, research shows that a striking 18% of Australian mums wish for a heartfelt, handmade DIY gift for Mother's Day. That puts it just behind a weekend away as the most desired present!
This is especially telling when you hear that nearly half of Aussie mums have admitted to re-gifting or faking a smile over presents that missed the mark. It just goes to show that thoughtfulness will always win over a hefty price tag. You can read more about what mums really want for Mother's Day.
A handmade gift is more than just an object. It's a hug you can hold, a memory you can see, and proof that you took the time to create something beautiful, just for her.
Elevating Your DIY Project
Creating a stunning handmade present doesn't mean you have to start completely from scratch. You can get a really professional, high-quality finish by pairing your personal touch with a beautifully made base. Think of it as a creative collaboration!
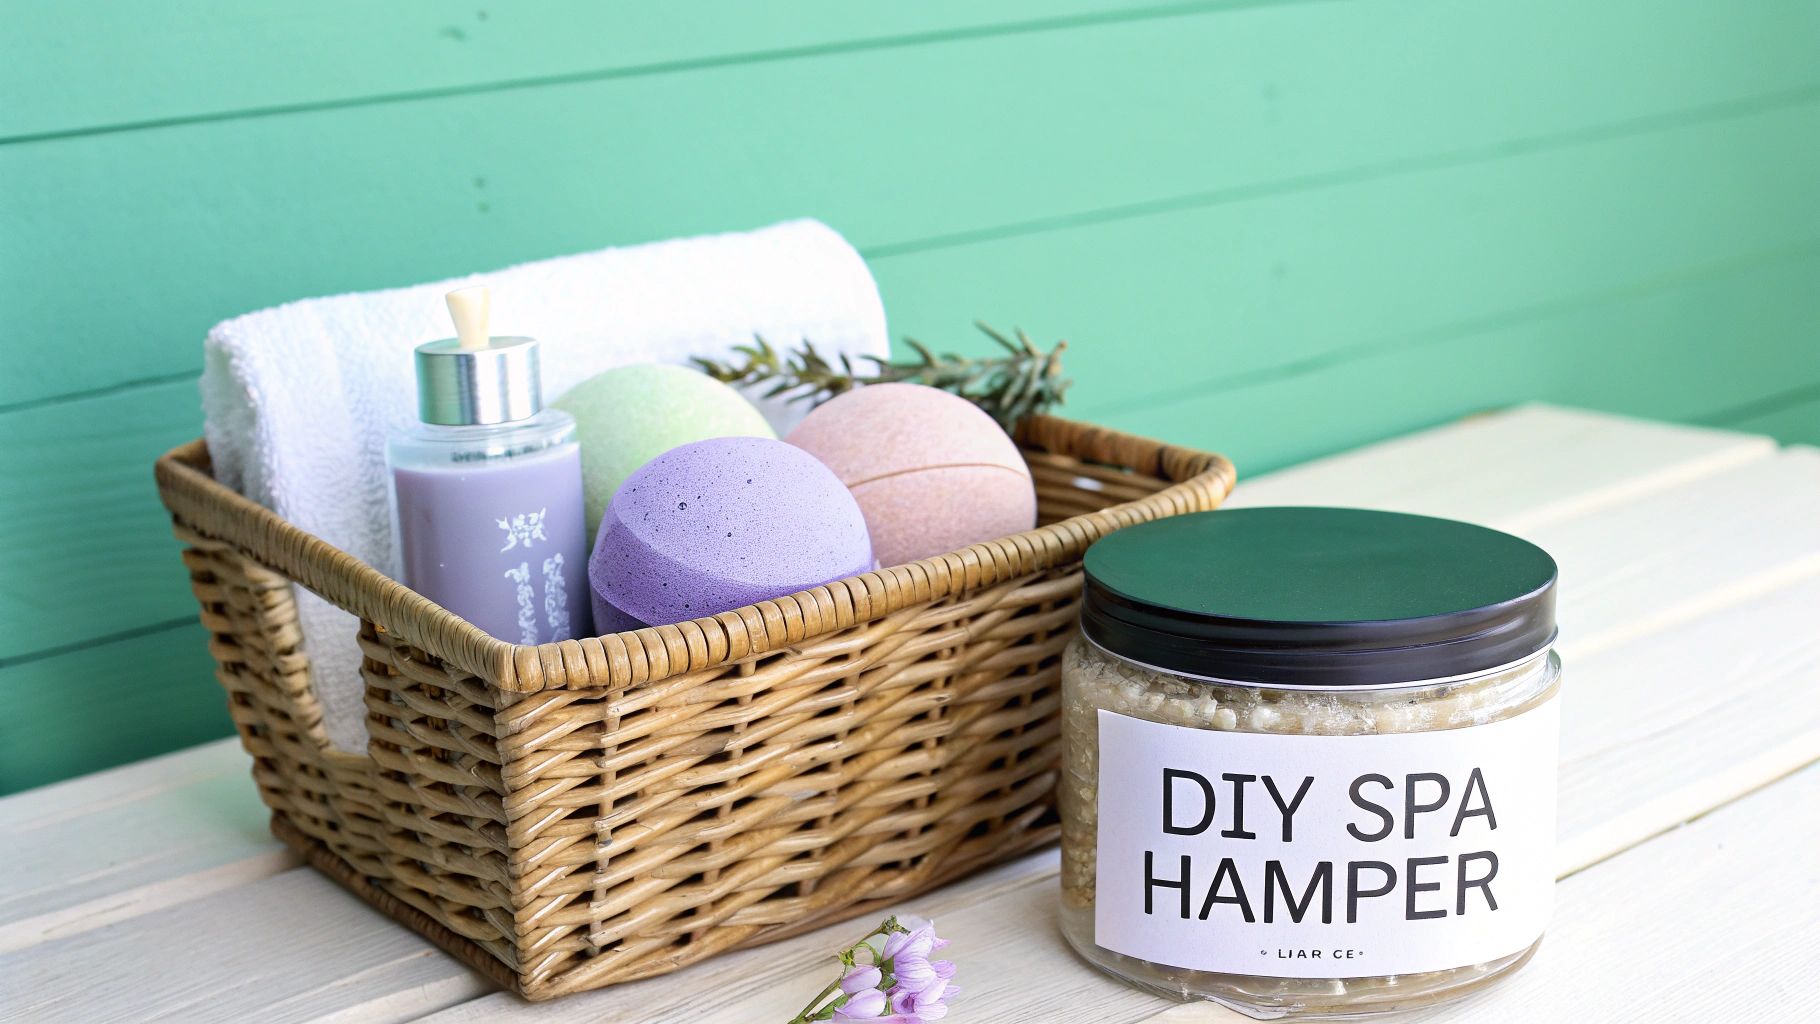
For instance, you could start with an elegant ceramic planter from our Bowtique collection and completely transform it with your own custom, hand-painted design. Another great idea is to assemble a bespoke self-care hamper, filling a gorgeous basket with your homemade bath bombs and body scrubs alongside one of her favourite luxury lotions.
This approach really gives you the best of both worlds: the unmatched sincerity of a DIY gift and the polished quality of a curated item. It's all about bringing your creative vision to life in the most beautiful way possible.
How To Plan Your DIY Gift Without The Last-Minute Panic
Let’s be honest, the best handmade gifts come from a place of thoughtful planning, not a caffeine-fuelled, last-minute panic session the night before Mother's Day. When you map out your project, you actually get to enjoy the process and create something you're genuinely proud to give.
So, how do we get there? It all starts with the fun part: brainstorming.
Think about your mum. What makes her light up? If she’s always in the garden, a hand-painted pot plant would be perfect. If her happy place is a cosy night in, a set of custom-scented soy candles could be just the ticket. If you need a little spark to get the ideas flowing, you can discover various DIY recipes online for inspiration.
This is the simple but powerful journey of a handmade gift—it starts with a thought, becomes real through your effort, and ends up as a treasured memory.

The real magic is in the effort you pour in, which transforms an everyday object into a meaningful keepsake she’ll cherish for years.
Setting A Realistic Timeline
Once you’ve landed on an idea, it’s time to get practical with a timeline. My go-to strategy is to work backwards from Mother’s Day. Trust me, it’s a game-changer for avoiding stress.
- 4 Weeks Out: This is your dream and scheme phase. Lock in your gift idea and jot down a detailed list of every single material you'll need.
- 3 Weeks Out: Time for a supply run! Whether you're clicking "add to cart" online or wandering the aisles of a craft store, get everything you need now. This leaves a nice buffer in case something is out of stock or needs to be shipped.
- 2 Weeks Out: Let the making begin! Carve out an afternoon or a few evenings to dive into your project. Put on some good music, relax, and enjoy the creative flow without feeling rushed.
- 1 Week Out: Now for the finishing touches. This is all about presentation—beautifully wrapping the gift, writing a heartfelt card, and making sure every detail is just right.
A well-paced project is an enjoyable project. Giving yourself ample time eliminates the pressure and allows your creativity to shine through, turning the act of making into part of the gift itself.
Crafting On A Budget
A gorgeous, heartfelt DIY gift doesn't need to break the bank. With Aussies projected to spend a whopping $1 billion on Mother's Day, it's clear we love to spoil our mums. Interestingly, even with cost-of-living pressures, the average spend has actually jumped from $102 to $141 per person.
This tells us one thing: people are choosing quality. And that's exactly where a thoughtful DIY gift shines—it’s packed with personal value without the hefty price tag.
The key is to be clever with your materials. You’d be surprised what you can achieve with a few smart swaps that deliver a high-end look for less.
Smart Swaps For A Budget-Friendly DIY Gift
Here’s a look at some easy swaps to keep your project budget-friendly while still looking absolutely fabulous.
| Standard Material | Budget-Friendly Swap | Pro Tip For A Premium Finish |
|---|---|---|
| Premium Craft Paper | High-Quality Gift Wrap or Wallpaper Samples | Choose a pattern with a metallic foil accent. It adds a touch of luxury and catches the light beautifully. |
| Speciality Ceramic Paints | All-Surface Acrylic Craft Paint | Once the paint is completely dry, give it a coat of clear gloss sealant spray. This protects the design and gives it a professional, kiln-fired sheen. |
| Store-Bought Embellishments | Natural Elements (Dried Flowers, Twigs, Shells) | Press flowers inside a heavy book for a week before you use them. This flattens them perfectly for gluing onto cards or gift tags. |
| Expensive Scented Oils | Infused Oils (e.g., Lavender or Rosemary in Olive Oil) | For a stronger scent in your candles or body scrubs, gently warm the oil with your chosen herb over low heat for 20 minutes. |
By planning ahead and making savvy choices with your materials, you can create a stunning gift that feels both luxurious and deeply personal. It's the perfect proof that the best presents truly do come from the heart, not the price tag.
Craft a Personalised Self-Care Hamper
Ready to create something that feels like a spa day in a basket? A beautiful, custom self-care hamper is one of the most heartfelt mothers day diy gifts you can give. It's so personal because you can tailor every single element to what helps your mum truly relax and unwind.
This guide will walk you through making three gorgeous spa essentials: fizzy bath bombs, a soothing lavender body scrub, and elegant hand-poured soy candles. Don't feel intimidated if you've never done this before! I've broken it all down into simple, easy-to-follow steps. It's meant to be a fun, creative project.
The real magic here is crafting a whole experience, not just a gift. By choosing her favourite colours and the scents that make her feel calm and happy, you're creating something that feels incredibly high-end and thoughtful.
Gather Your Spa Day Essentials
First up, let's get organised. I always find that having all my materials laid out before I start makes the whole process smoother and much more enjoyable. You should be able to find most of these ingredients at local craft shops, supermarkets, or online.
For Fizzy Bath Bombs:
- 1 cup bicarbonate of soda (baking soda)
- 1/2 cup citric acid (this is what makes them fizz!)
- 1/2 cup Epsom salts or cornflour
- 1 tablespoon of a carrier oil like coconut, almond, or even olive oil
- 10-15 drops of her favourite essential oil (think lavender for calm, or citrus for a bit of a boost)
- A few drops of food colouring if you want to add a pop of colour
- A spray bottle filled with water
- Bath bomb moulds or a silicone muffin tray works perfectly
For a Soothing Body Scrub:
- 1 cup of white or brown sugar for exfoliation
- 1/2 cup of melted coconut oil
- 10 drops of lavender essential oil
- 1 tablespoon of dried lavender buds (this little touch makes it feel extra luxe)
- A small, airtight glass jar to store it in
For Hand-Poured Soy Candles:
- Soy wax flakes
- Candle wicks with their metal bases
- Heat-proof containers – old teacups or glass jars look lovely
- A pouring pot or a simple microwave-safe jug
- A scent she adores (candle fragrance oil or essential oils work well)
- A clothes peg to hold the wick in place
Pro Tip: Scent is such a powerful tool for personalisation. Really think about your mum. Does she love the smell of a garden after it rains? Or is she more of a zesty, citrus person? Choosing a fragrance you know she'll love makes the gift feel so much more special.
Creating Your Handmade Hamper Items
Got all your supplies? Great! Let’s get crafting. We'll tackle each item one at a time.
First, the bath bombs. Grab a large bowl and whisk together all your dry ingredients – the bicarb soda, citric acid, and Epsom salts. In a separate, smaller bowl, mix your wet ingredients: the carrier oil, essential oil, and any food colouring.
Now for the tricky part. Very slowly, add the wet mixture to the dry, whisking the whole time. You want to avoid setting off the fizz too early! The goal is a texture that feels like slightly damp sand. If it seems too dry, give it a light spritz with water from your spray bottle. Pack the mixture firmly into your moulds and leave them to dry for at least 24 hours.
Next up is the body scrub, which is wonderfully simple. Just combine the sugar and melted coconut oil in a bowl, then stir through the lavender essential oil and dried buds. That's it! Spoon it into your airtight jar, and you have a beautiful, divine-smelling scrub ready to go.
Finally, let's pour the candles. Melt your soy wax flakes either in a pouring pot on the stove or in a jug in the microwave, using short bursts. While the wax is melting, secure a wick to the bottom centre of your chosen container. Once the wax is fully melted, let it cool down just a little before stirring in your fragrance.
Carefully pour the scented wax into your container. A handy trick is to use a clothes peg laid across the top to hold the wick perfectly straight and centred. Now, just let it set completely, which can take several hours. You’ll be left with an elegant, professional-looking candle.
Assembling The Perfect Presentation
This is the final flourish, where you turn your lovely handmade items into a stunning, cohesive gift. The right presentation can elevate your mothers day diy gifts from nice to absolutely unforgettable.
Start with a beautiful basket, a rustic wooden crate, or even a decorative box. Line it with something soft – shredded paper, tissue paper, or a plush hand towel that becomes part of the gift itself.
Arrange your items with a bit of thought. I usually place the largest item, like the candle, toward the back. Then, I nestle the smaller things, like the bath bombs and the scrub jar, in front. Adding a few dried flowers or a sprig of greenery is a lovely final touch.
If you’re looking for a few more ideas to round out your hamper, check out our guide on other wonderful ideas for Mother's Day. Don’t forget a handwritten tag explaining what you've made and why you chose those particular scents. That personal story is what transforms a collection of items into a gift straight from the heart.
Create Hand-Painted Homewares With A Personal Touch
There’s something truly special about turning a simple, everyday item into a keepsake your mum will treasure. Hand-painted homewares are fantastic mothers day diy gifts because they perfectly mix practicality with a deeply personal message. Every time she reaches for her morning cuppa, she’ll be thinking of you.
This project is all about letting your creativity flow onto a blank canvas. We're going to look at three wonderful options: a classic ceramic mug, a cheerful terracotta planter pot, and a custom photo frame just waiting to hold a precious memory.
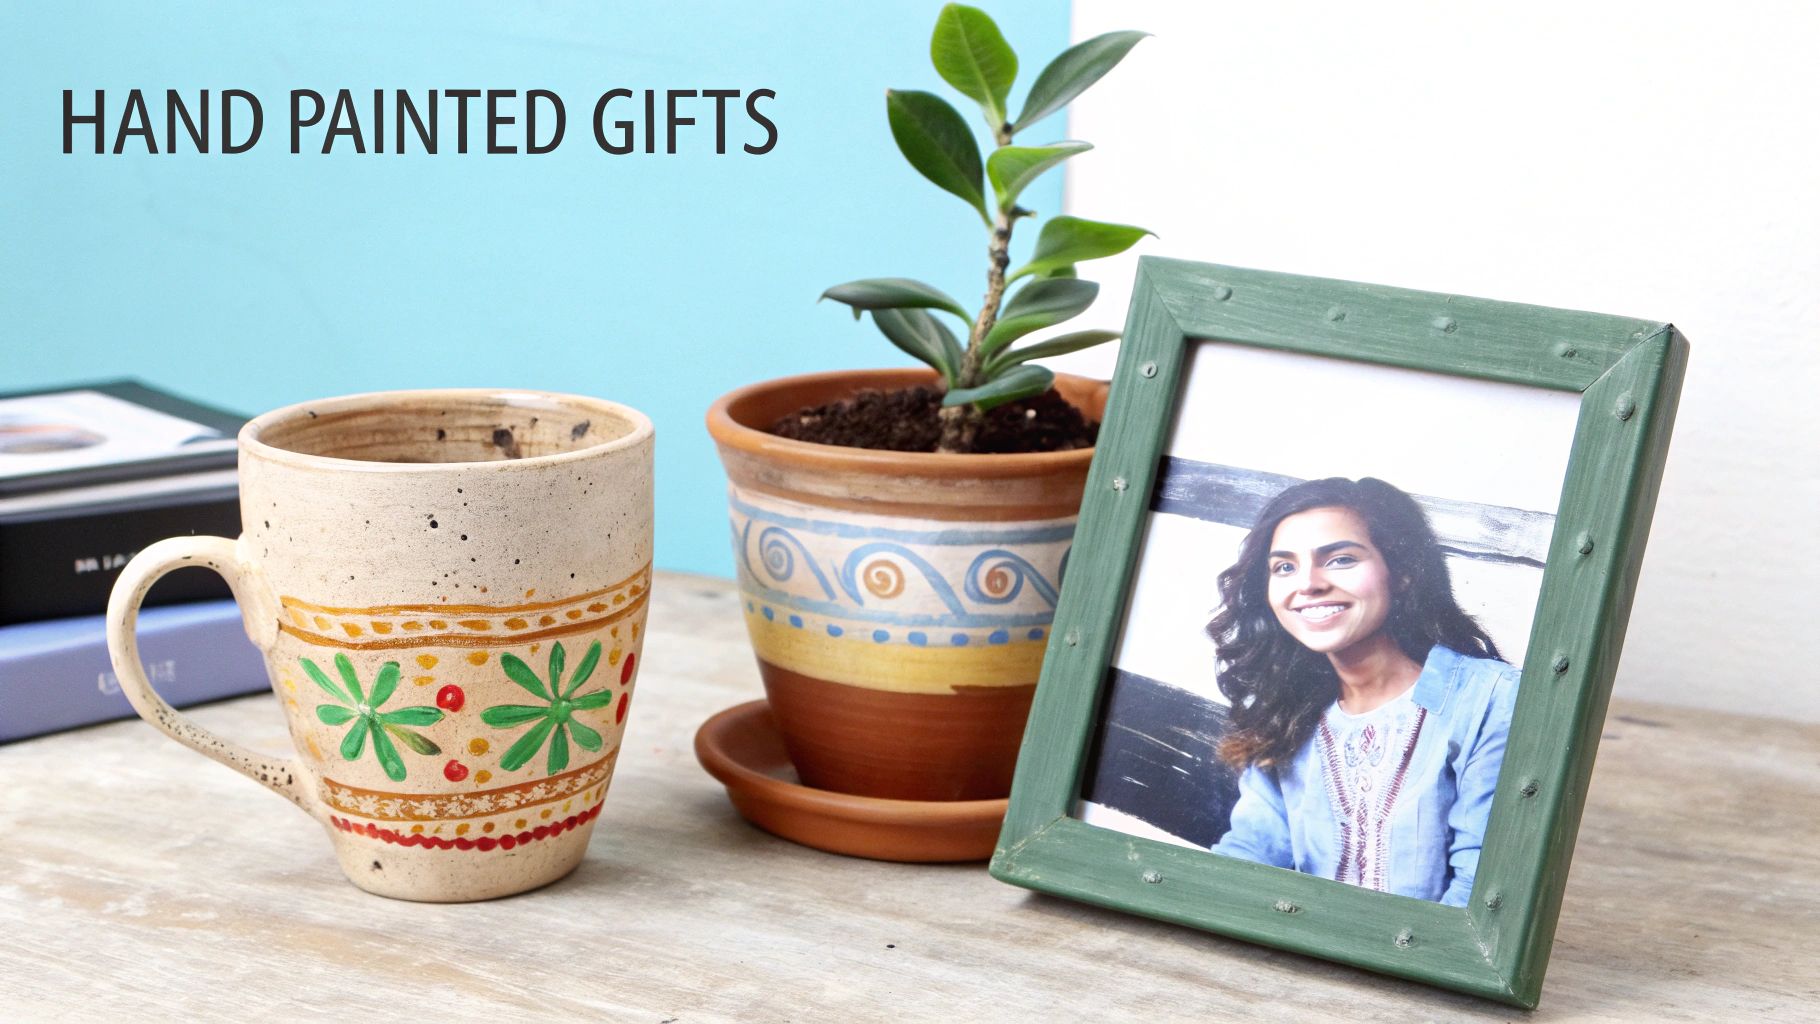
And don't worry—you don't need to be Picasso to make something beautiful. It could be as simple as her initials, a favourite flower, or a cute inside joke. The real magic is in the thought you pour into it. We'll even cover the best paints and sealants to give your creation a durable, professional finish that's made to last.
H3: Choosing Your Canvas And Materials
Before you dive in, gathering the right supplies is the first step to success. While each mini-project has slightly different needs, the basic toolkit is quite similar, making this a really accessible starting point for any skill level.
For a Custom Ceramic Mug:
- A plain, light-coloured ceramic mug is your best bet (porcelain works a treat).
- Grab some oil-based paint markers or special ceramic paints.
- Keep rubbing alcohol and cotton balls handy for prep.
- You’ll need an oven to set the paint (always check the paint instructions!).
For a Decorated Terracotta Pot:
- A classic terracotta planter pot and its matching saucer.
- All-surface acrylic craft paints in her favourite colours.
- A few paintbrushes in different sizes for details and coverage.
- A clear, waterproof acrylic sealant (a spray-on one is super easy).
For a Personalised Photo Frame:
- A plain wooden or MDF photo frame.
- Acrylic paints or paint pens for precision.
- A small piece of fine-grit sandpaper (essential for wooden frames).
- A clear varnish or sealant to protect your handiwork.
My secret weapon for prepping any non-porous surface like a mug is a quick wipe with rubbing alcohol. It instantly removes any invisible oils or fingerprints, helping the paint stick perfectly for a flawless, long-lasting finish.
DIY homewares are a fantastic way to give a meaningful gift without breaking the bank. And it seems Aussies agree! House-related gifts, including homewares and gardening goodies, now make up 7% of Australia's $1 billion Mother's Day spending. It points to a real love for thoughtful, unique presents, with 23% of people opting for personalised gifts and 18% of mums saying they'd love something handmade. You can check out the full research on Australian Mother's Day spending trends.
H3: Step-By-Step To A Painted Masterpiece
Alright, here comes the fun part! Let's get painting. The most important thing is to relax, enjoy the process, and create something straight from the heart.
First up, give your surface a thorough clean. For the mug, use that rubbing alcohol trick. For the terracotta pot, a simple wipe to remove dust is fine. If you've got a wooden frame, give it a quick, light sand to create a perfectly smooth canvas for your paint.
Next, you might want to lightly sketch your design with a pencil. This is a great way to map out your idea before you commit. Don’t stress about mistakes! If you're using paint pens on the mug, a little rubbing alcohol can often wipe away a slip-up while the paint is still wet.
Once you’re happy with the plan, it's time to start painting. Use a steady hand, put on some music, and take your time. Paint pens are brilliant for fine details and lettering on the mug and frame. For the planter, acrylic paints and brushes are your best friends for covering larger areas and blending colours.
Finally—and this is the crucial part for durability—let it dry, then seal your work. For the mug, most ceramic paints need to be baked in a regular oven to become permanent. Just be sure to follow the instructions on your specific paint. For the pot and frame, a coat or two of clear sealant once the paint is bone dry will protect your beautiful art from chipping, fading, or water damage.
H3: DIY Project Quick Glance Guide
Feeling inspired but not quite sure which project is the right fit? This little guide should help you choose the perfect one based on how much time you have, your confidence level, and of course, what your mum loves most.
| DIY Gift Project | Difficulty Level | Estimated Time | Perfect For a Mum Who Loves... |
|---|---|---|---|
| Hand-Painted Mug | Beginner | 1-2 hours (plus baking time) | Her daily coffee or tea ritual and appreciates a quirky, personal touch in her kitchen. |
| Decorated Planter Pot | Beginner-Intermediate | 2-3 hours (plus drying time) | Gardening, indoor plants, and adding a splash of colour to her home or patio. |
| Custom Photo Frame | Beginner | 1-2 hours (plus drying time) | Family photos, sentimental keepsakes, and decorating with meaningful objects. |
Each of these mothers day diy gifts is a beautiful way to show you care. When you take a simple, everyday object and pour your own creativity and affection into it, you're not just giving a gift—you're creating a memory she'll genuinely hold dear.
Master The Art Of Thoughtful Gift Wrapping
The way you present your mothers day diy gifts is the very first glimpse your mum gets of the love and effort you’ve poured inside. It really does set the scene. Thoughtful wrapping turns the simple act of giving into a beautiful, memorable experience, so let's move beyond basic paper and make the outside as special as what’s within.
This is your chance to add another layer of personalisation that she'll truly appreciate. Creative and eco-friendly options not only look stunning but also show an extra level of care. It’s about creating an entire package that feels intentional, from the gift itself right down to the final ribbon.
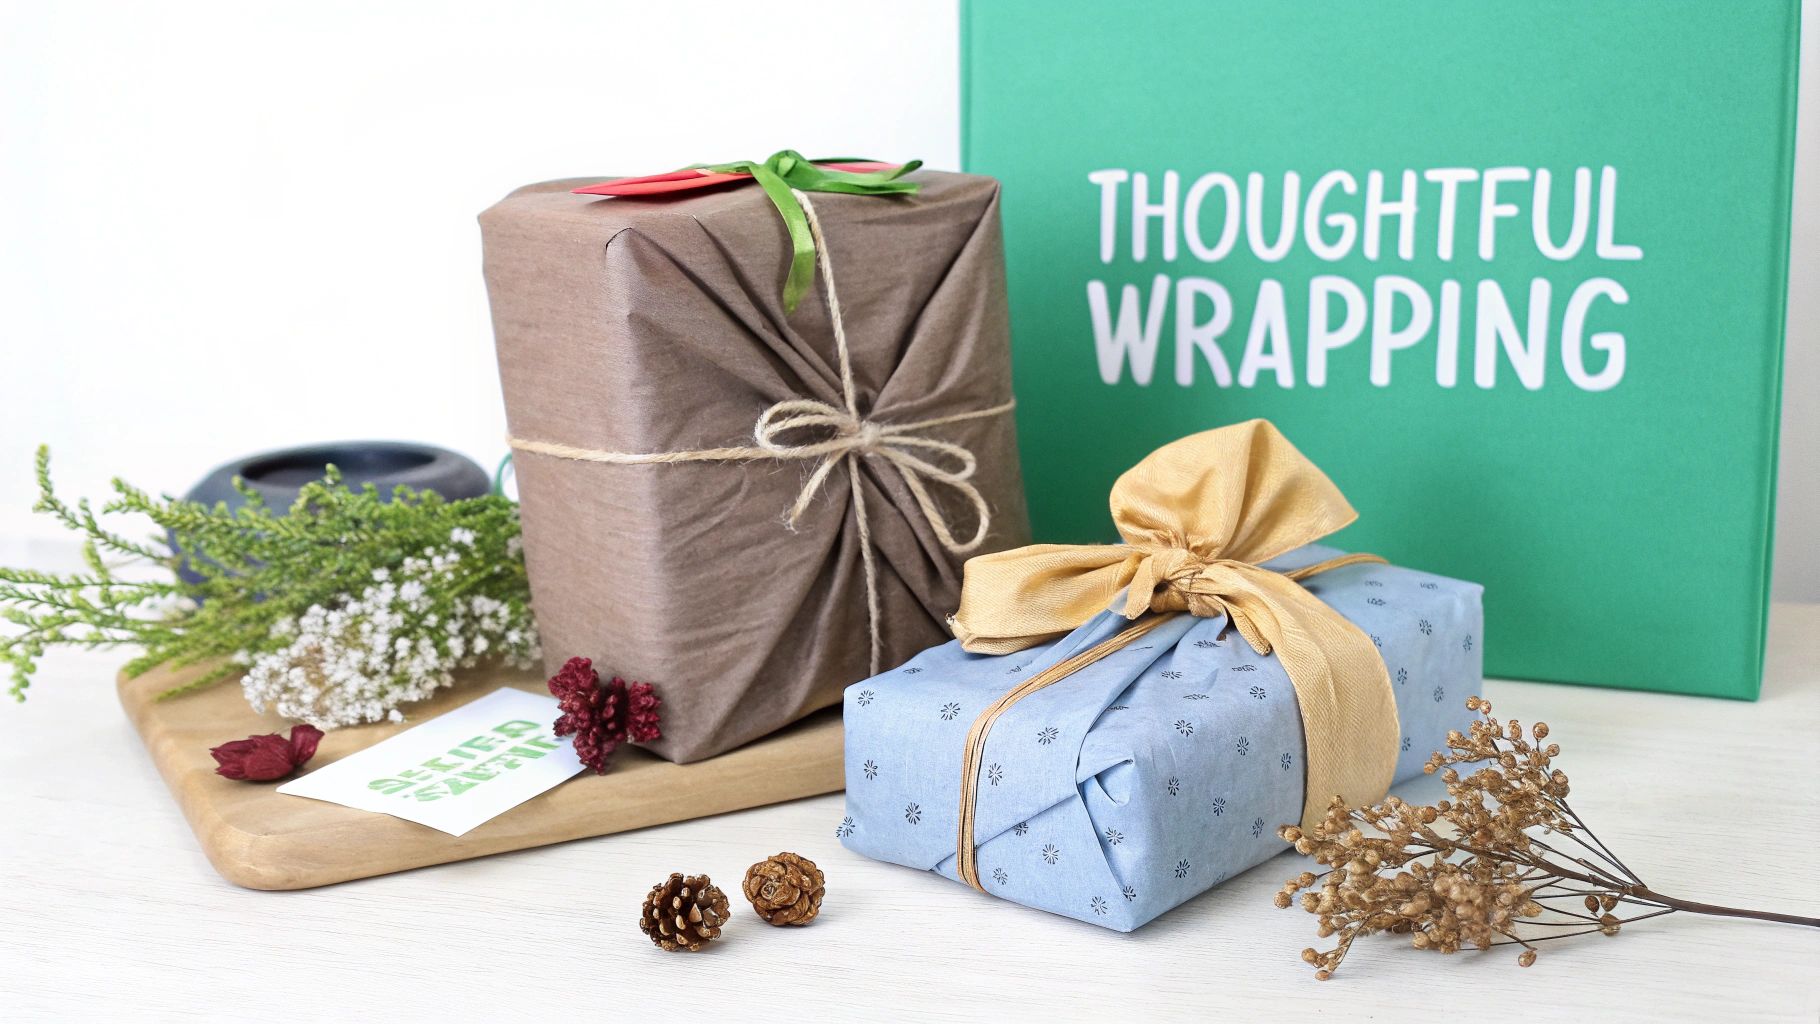
Embrace Sustainable And Stylish Wrapping
Let's explore some beautiful alternatives to traditional paper that are both elegant and much kinder to the planet.
One of my absolute favourite techniques is Furoshiki, the Japanese art of fabric wrapping. You just need a beautiful square of fabric—a vintage silk scarf, a lovely linen tea towel, or even a custom-printed piece of cotton. It’s incredibly versatile, completely zero-waste, and the fabric itself becomes a lovely bonus gift.
You could also create your own custom gift tags. Instead of grabbing a generic pack from the shops, try making them from recycled materials like old greeting cards or some spare cardstock. A simple hole punch and a bit of twine are all it takes to add a truly personal touch.
Finally, bring a little bit of the outdoors in by using natural elements as embellishments.
- Dried Flowers: Tuck a few stems of dried lavender or a sprig of baby's breath under the ribbon for a rustic, fragrant finish.
- Fresh Greenery: A small clipping of rosemary or eucalyptus from the garden adds a gorgeous pop of colour and a beautiful scent.
- Twine and Natural Fibres: Swap out that shiny plastic ribbon for jute twine or natural cotton ribbon for a more earthy, elegant look.
The most beautiful wrapping often comes from the heart, using materials that tell a story. Think of the wrapping not as a covering, but as an extension of the gift itself.
Tackling Awkwardly Shaped Gifts
We've all been there: staring at a beautifully crafted but awkwardly shaped gift, like a self-care hamper or a hand-painted planter pot, with a roll of wrapping paper that just will not cooperate. Don't worry, there are some simple and elegant solutions that I turn to all the time.
For something like a hamper, the key is to embrace its shape, not fight it. Just place the basket in the centre of a large piece of clear or decorative cellophane. Gather the cellophane up and around the hamper, securing it at the top with a beautiful, oversized bow. This creates a polished, professional look that still allows all the lovely items inside to peek through.
Planter pots can be just as easy. You can use the Furoshiki fabric-wrapping technique I mentioned earlier, which drapes beautifully around curved shapes. Or, you could create a simple gift bag from sturdy, decorative paper or fabric—just measure, fold, and glue, then finish with ribbon handles for a custom bag that fits perfectly. For more inspiration, you can find some great actionable ideas for thoughtful gift packaging that can really elevate the whole experience.
These techniques ensure that even the most unusually shaped handmade gifts look intentional and stunning. It shows your mum that you considered every single detail, making her feel cherished from the very first moment.
Got Questions About Your DIY Gift? Let's Chat.
Feeling a bit wobbly about starting a mothers day diy gifts project? I get it. The thought of making something from scratch can feel like a lot of pressure, but I'm here to help you push past any creative jitters. Think of this as your personal pep-talk section.
The number one worry I hear is, "But I'm not creative at all!" Let's just toss that idea out the window right now. The most incredible handmade gifts come from the heart, not from a professional art studio. It's the thought, the care, and those little personal touches that your mum will hold onto.
What If I’m Just Not a Creative Person?
You absolutely can still make a beautiful gift! Seriously. The magic of DIY is all in the thoughtfulness, not about getting every single line perfect.
If you're feeling unsure, pick one of the simpler projects to start. The self-care hamper is a wonderful choice because it's more about assembly and curation, and personalising a ready-made mug or planter pot is another fantastic way to dip your toes in.
The key is to focus on what makes it uniquely for her.
- Weave in her favourite colours.
- Pick a scent you know she adores.
- Etch a meaningful quote or a silly inside joke onto it.
That personal link is what turns a simple object into something she’ll treasure forever. She's going to value the love and effort you poured into it way more than a flawless finish.
Perfection isn't the goal—thoughtfulness is. Those little imperfections are actually what make a handmade gift so charming; they're proof it was made by a real person, with real love. A tiny smudge or a wobbly line just becomes part of the gift's unique story.
How Much Time Should I Set Aside for a DIY Gift?
That really depends on which project you fall in love with. Decorating a mug could be a quick, one-hour job on a quiet afternoon. On the other hand, putting together a full-blown self-care hamper might be a lovely, slow-paced weekend activity.
Each of our project guides gives you a time estimate, but here’s my best piece of advice: always give yourself a bit more time than you think you'll need. A little buffer keeps the whole thing from feeling rushed.
A great way to manage your time is to break the project down. You could make the bath bombs on a Tuesday night, then mix the body scrub on Wednesday. This keeps it relaxed and fun, so you can actually enjoy the process instead of scrambling at the last minute.
Can I Mix a DIY Gift With Something I Buy?
Yes! This is a brilliant idea and honestly one of my favourite ways to build a really memorable present. You get the best of both worlds: the beautiful quality of a store-bought item paired with the heartfelt sincerity of your own creation.
For instance, you could hand-paint a gorgeous planter pot and then pop in a stunning plant from her favourite local nursery. Another idea I love is making a set of unique, handmade gift tags and tying them to a beautiful piece from our collection you know she’s had her eye on. It just adds that extra layer of love to a quality product, making the whole gift feel incredibly thoughtful.
Ready to find the perfect piece to get your creative juices flowing? The Bowtique collection is brimming with beautiful, high-quality items that are the perfect canvas for your DIY project. Explore our curated selections and find something special to personalise for Mum.